
As a homeowner, every creak and groan in your house can send a shiver down your spine.
A sudden drip-drip from the bathroom sink? That’s not just water – it sounds like money going down the drain.
Before you panic about the potential expense, consider this: what if you could fix it yourself?
Can you do your own plumbing?
Plumbing and drainage might seem like a job best left to the professionals, but it’s not as intimidating as it sounds.
Sure, the thought of accidentally flooding your bathroom is scary. But, many plumbing fixes are much simpler than they appear. With a basic toolkit and trusty guidance, what seems like a tricky job will soon feel like second nature.
The perks of learning how to fix things yourself go beyond just saving a few bucks.
There’s a genuine buzz in solving your own problems. It boosts your confidence and might even spark a new hobby.
Plus, this know-how can be a lifesaver in a pinch, cutting down the long wait times for professional help.
In this guide, we’ll walk you through four key steps that will kickstart your DIY plumbing skills. From tightening a leaky tap to unclogging a drain, you’ll soon be handling these tasks with ease.
Are you ready to stop that annoying drip and feel like a hero in your home? Let’s get into it.
Step 1 – understand your plumbing system
DIY plumbing starts with a basic map of your home’s system.
Where does the water come in? Where does it go after you use it? Getting to know this flow is your first step.
Your plumbing does two main things: bring in fresh water and take out the wastewater. The water entering your home has pressure behind it, allowing it to travel upstairs, around corners, or wherever needed. Once used, the water exits through a different set of pipes.
And as a homeowner, you should familiarise yourself with a few critical components:
- Main Shut-off Valve: This is the master switch for water supply in your entire house. Knowing where this valve is can save you from a potential flood if there’s a major leak.
- Pipes: These transport water around your home. Some are for incoming water, and others carry away used water.
- Drains: Every sink, shower, and toilet has one. They’re the exit routes for used water.
- Faucets: These are your access points for controlling water flow.
Understanding what each part does is important, especially in emergencies. It’s like knowing where the circuit breaker is when the power goes out. You might not need to use this knowledge every day, but when you do, it’s a lifesaver.
Next, let’s break down these parts a bit more:
- Water Metre: Typically found at the front of your property, this measures the volume of water your home uses. It’s often near the main shut-off valve.
- Hot Water Systems: This is where your hot water brews. It’s usually a large tank unless you have a tankless system.
- Sump Pump: If you have a basement, you might also have a sump pump. It helps to keep the area dry by pumping out accumulated water.
Remember, a well-informed homeowner is a well-prepared homeowner.
Familiarise yourself with the layout and components of your plumbing system. A little curiosity goes a long way in helping you become more confident in handling your plumbing needs.
Step 2 – gather your tools
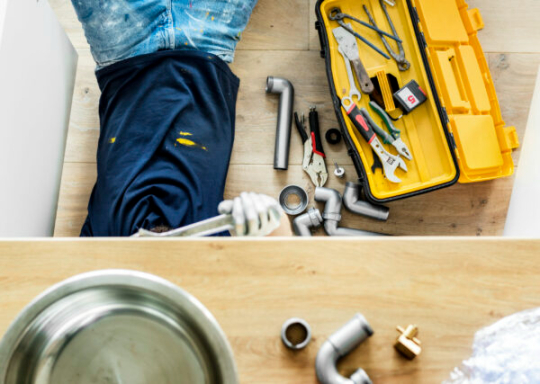
Having the right plumbing tools is like filling your pantry with the right ingredients before cooking.
You don’t need a lot, just a few basics:
- Adjustable Wrenches: This wrench tightens and loosens nuts and bolts. It’s a must-have for almost any plumbing job.
- Pliers: These are great for gripping when you need more torque than your fingers can provide. Slip-joint pliers are particularly helpful for plumbing twork.
- Plumber’s Tape: Also known as thread seal tape, this is used on the threads of plumbing joints to prevent leaks by ensuring a tighter seal.
- Plunger: A must-have for any home, this simple tool can quickly and effectively clear clogs in sinks, toilets, and drains.
Once you are ready to level up your skill and want to tackle tougher jobs, consider adding these tools to your toolbox:
- Hand Auger or Plumber’s Drain Snake: For tougher clogs that a plunger can’t clear, a hand auger can reach deep into pipes to remove blockages.
- Pipe Wrench: Heavier and more robust than your standard wrench, this tool is ideal for dealing with large pipes or fittings that need a firm twist.
Now that you know what each tool does, find a way to keep them organised.
A specific drawer, toolbox, or shelf for your plumbing tools means you’ll always know where they are when needed. This organisation saves time and frustration during a plumbing crisis.
Step 3 – tackle common plumbing problems
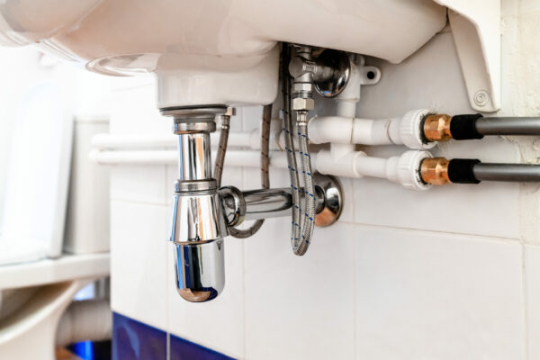
Learning to fix common plumbing issues can turn a potential disaster into a minor task.
Here’s how to deal with some of the most common problems using the basic tools listed above.
Clogged Drain
- Place the plunger over the drain and press down firmly to create a tight seal. Pump it up and down vigorously several times. This creates enough suction to dislodge the clog.
- Lift the plunger to see if the water drains swiftly. If not, repeat the pumping action until the clog is clear.
- If the plunger doesn’t clear the clog, a plumber’s snake is your next best friend. Insert the snake into the drain and push until you feel resistance. Turn the handle to twist the snake, breaking up the clog. Pull the snake out and run water to clear any remaining debris.
Leaky Faucet
- First, turn off the water supply to the faucet. There’s usually a valve under the sink, but if you can’t find one, you might need to use the main shut-off valve.
- Open the faucet to let out any leftover water and relieve pressure in the faucet.
- Take the faucet apart. Remove the handle by loosening a screw that’s often hidden under a decorative cap.
- Use your wrench to loosen and remove the nut. Underneath, you’ll find the stem or cartridge. Take this out and replace any worn washers or O-rings.
- Reassemble the faucet, turn the water back on, and check for leaks. If you see any drips, try tightening the nut a little more. If the leak persists, there might be a bigger issue, and it might be time to call a professional plumber.
Clogged Toilet:
- Place the plunger in the toilet bowl and push down gently to expel air. This first push is just to get a good seal, not to plunge yet.
- Now, pump the plunger vigorously while maintaining the seal. This action can help dislodge the clog and get your toilet flushing normally again.
- Flush the toilet to see if the clog clears. If the toilet starts overflowing, shut off the water using the valve near the toilet’s base.
With these steps, you can confidently tackle the most typical problems that plague household plumbing.
But remember, the key to efficient DIY plumbing is patience and preparation. With each repair, you’ll better handle your home’s plumbing needs.
Step 4 – maintain your plumbing regularly
Regular maintenance is the secret to a trouble-free plumbing system. Just like any good habit, a little effort in keeping an eye on your plumbing can prevent big problems down the road.
Regular Checks
- Inspect for Leaks: Every few months, tour your home and look at all visible pipes, under sinks, and around your appliances for any signs of leaks or corrosion. Remember, a tiny leak can turn into a costly repair if left unattended.
- Monitor Water Pressure: Too much pressure can stress your pipes and lead to leaks. You can buy a simple gauge at most hardware stores for pretty cheap. Ideally, it should be between 40-60 psi. If yours is higher, you can adjust it using a pressure-reducing valve. If you’re not comfortable doing that yourself, a licensed plumber can help.
Preventative Practices
- Clean Drains Regularly: Don’t let stinky sink drains become a problem. Once a month, use baking soda and vinegar to keep your drains clean and free from odours. Avoid chemical cleaners, as they can damage your pipes over time.
- Soften Hard Water: If you live in an area with hard water, consider installing a water softener. Hard water can build up and wear out your fixtures and appliances more quickly.
A little effort goes a long way! With these simple routines, you can extend the life of your plumbing system and minimise future headaches.
When to Call a Professional
DIY plumbing can be rewarding, but significant issues are still best left to the professionals.
If you encounter issues that just won’t go away, such as complex problems like major blockages or anything requiring a permit, it’s time to seek expert help.
That said, it’s wise to build a relationship with a reliable plumber for emergencies and complicated tasks.
Remember, it’s perfectly okay not to know everything. Knowing your limits and when to consult a professional is a valuable part of smart home maintenance.
Take the plunge into DIY plumbing
Remember, every plumber started somewhere – and now you’re on your way too.
Embrace what you’ve learned and apply it with confidence. Whether it’s a leaky faucet or a clogged drain, you now know how to handle it.
So ditch the fear and grab your plunger. And remember, anytime anything gets too overwhelming, you can pick up the phone and call your local plumber.