
Key takeaways
- Knowing how to fix leaking taps saves money and conserves water, with a sense of DIY accomplishment.
- Identify the leak source, gather basic tools, turn off the water supply, and follow steps for either compression or cartridge faucets.
- Call a professional if there is extensive damage, hidden leaks, or complex plumbing issues.
The constant pitter-patter of a leaky tap can be maddening. It’s like the faucet is mocking you, daring you to do something about it. You start to notice the rising water bill and the feeling of helplessness sets in.
The sound can drive anyone up the wall, but here’s the silver lining – fixing a leaky tap is easier than you might think. With a bit of guidance, you’ll not only save money but also conserve water and gain a sense of accomplishment.
So why not tackle it head-on? The benefits are clear.
First, you’ll cut down on those pesky water bills. A single drip per second can waste over 3,000 gallons of water a year. That’s not just bad for your wallet; it’s bad for the planet too.
Second, there’s the environmental angle. Freshwater is a precious resource and every drop saved counts. By fixing that leak, you’re contributing to a more sustainable world.
Lastly, there’s the satisfaction of knowing you’ve fixed it yourself. It’s empowering to roll up your sleeves, follow a few straightforward steps, and solve the problem.
So, next time that tap starts its annoying drip, remember – you’ve got this. Let’s walk through the simple steps to silence that faucet for good.
Before heading into battle
Think of this as your pre-game warm-up. Before diving into the nitty-gritty of fixing that pesky leak, let’s take a moment to gear up.
Identify the culprit
The first step in fixing a leak is identifying where it’s coming from. Common culprits include faucets, showerheads, and the pipes under your sink.
To pinpoint the source, start with a visual inspection. Look for any obvious drips or pools of water around these areas. Sometimes, you can simply listen for the telltale sound of dripping water.
Another useful trick is to check your water metre. Turn off all the water in your house, and then check the metre. If it’s still running, you’ve got a hidden leak somewhere.
It’s also important to distinguish between a dripping and a spraying leak. Having to fix a dripping tap usually means a worn-out washer or seal, while a spraying leak might indicate a more severe issue, like a broken pipe. Understanding the severity helps you determine the best approach for the fix.
Gather your tools
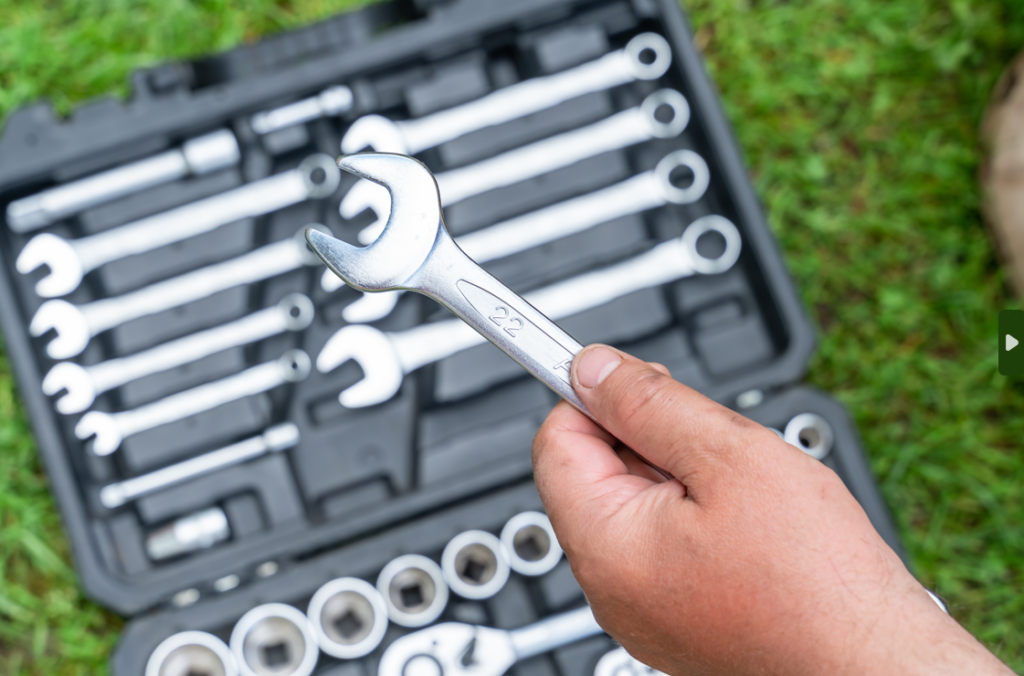
For most faucet repairs, you’ll need an adjustable wrench, a flat-head screwdriver, a bucket, and replacement washers.
Don’t worry if you don’t have a full toolbox. Pliers can often substitute for a wrench, and in a pinch, even a spoon can help you pry off certain parts.
How to fix leaking taps in six steps
Fixing a leaky tap might seem difficult, but it’s a task that even a novice can handle with the right guidance. By breaking down the process into six clear, actionable steps, you can confidently tackle that drip and save both water and money.
Step 1 — turn off the water supply
First things first – you need to stop the water flow. Locate the shut-off valve, usually found under the sink. Turn it clockwise until it’s fully closed. This prevents any water from coming through while you work on the faucet.
If you can’t find the valve under the sink, you might need to shut off the main water supply for your house.
Step 2 — release any pressure
With the water supply turned off, you’ll want to release any built-up pressure in the pipes. Open the faucet fully and let any remaining water drain out.
This step makes sure you won’t get splashed when you start disassembling the faucet.
Step 3 — identify the faucet type
Now, it’s time to figure out what type of faucet you have.
There are two main types: compression and cartridge.
- Compression faucets – these have separate knobs for hot and cold water. You’ll feel the resistance when turning the knobs.
- Cartridge faucets – these typically have a single handle that moves up and down to control water flow and left to right to adjust the temperature.
Knowing which type of faucet you’re dealing with will determine the next steps.
Step 4 — tackle a compression faucet
Got a compression faucet?
Here’s how to fix it:
- Remove the handle – use a flat-head screwdriver to pry off the decorative cap on the handle, if there is one. Unscrew the handle and pull it off.
- Replace the washer — underneath the handle, you’ll see a stem. Use an adjustable wrench to unscrew the packing nut, then remove the tap then the stem. At the bottom of the stem, you’ll find the washer – usually held in place with a screw. Remove the screw and replace the old washer with a new one of the same size.
- Tighten the packing nut – once the new washer is in place, reassemble the stem and tighten the packing nut securely. This ensures a good seal.
- Reassemble — put the handle back on, screw it in place, and replace any decorative caps.
Step 5 — conquer a cartridge faucet
If you have a cartridge faucet, follow these steps:
- Remove the handle – look for a set screw at the base of the handle. Loosen this screw with an Allen wrench and lift the handle off.
- Replace the cartridge – under the handle, you’ll see the cartridge, usually held in place with a retaining nut or clip. Remove this with pliers or a wrench. Carefully pull out the old cartridge and take it to the hardware store to find an exact match.
- Reassemble – insert the new cartridge, secure it with the retaining nut or clip, and put the handle back on. Tighten the set screw to hold the handle in place.
Step 6 — turn on the water and test
With your faucet reassembled, it’s time to test your work.
Slowly turn the water supply valve back on by rotating it counterclockwise. Open the faucet and check for any leaks.
If everything’s dry and the dripping has stopped, congratulations – you’ve successfully fixed your leaky tap!
If you notice any leaks, double-check that all parts are securely fastened and that you used the correct replacement parts. Sometimes, a minor adjustment is all that’s needed to achieve a perfect seal.
When to call in the professionals

Sometimes, despite your best efforts, a leak can be more complex than a simple DIY fix. Knowing when to call in a professional plumber can save you time, money, and frustration.
Here are some signs that indicate you might need professional help:
- Extensive damage – if the area around your faucet shows signs of water damage or mould, a professional can assess and repair the underlying issues.
- Hidden leaks – if you’ve checked the obvious sources but still hear water dripping or notice unexplained increases in your water bill, there could be a hidden leak within your plumbing system.
- Complex plumbing systems – homes with intricate plumbing setups or older plumbing systems may require the expertise of a plumber to ensure a proper fix.
Finding a qualified plumber doesn’t have to be daunting. Start by checking online reviews and ratings on sites like Yelp or Google. Ask for recommendations from friends, family, or neighbours who have had positive experiences with local plumbers.
Remember, while tackling a leaky tap can be empowering, knowing when to call in the experts ensures the job is done right and prevents further complications.
Mission accomplished!
Not only have you silenced that annoying drip, but you’ve also saved money on your water bill and conserved a precious resource.
The sense of accomplishment that comes with a DIY fix is unmatched. You’ve tackled a common household issue head-on and gained valuable skills in the process. This is just the beginning of your journey in home maintenance.
Why stop here? There’s a world of DIY projects and home upkeep tasks waiting for you. Each one is an opportunity to save money, learn something new, and keep your home running smoothly. So, keep exploring, keep learning, and enjoy the satisfaction of a well-maintained home.